The simple way to spot drafty doors and windows before the cold locks in
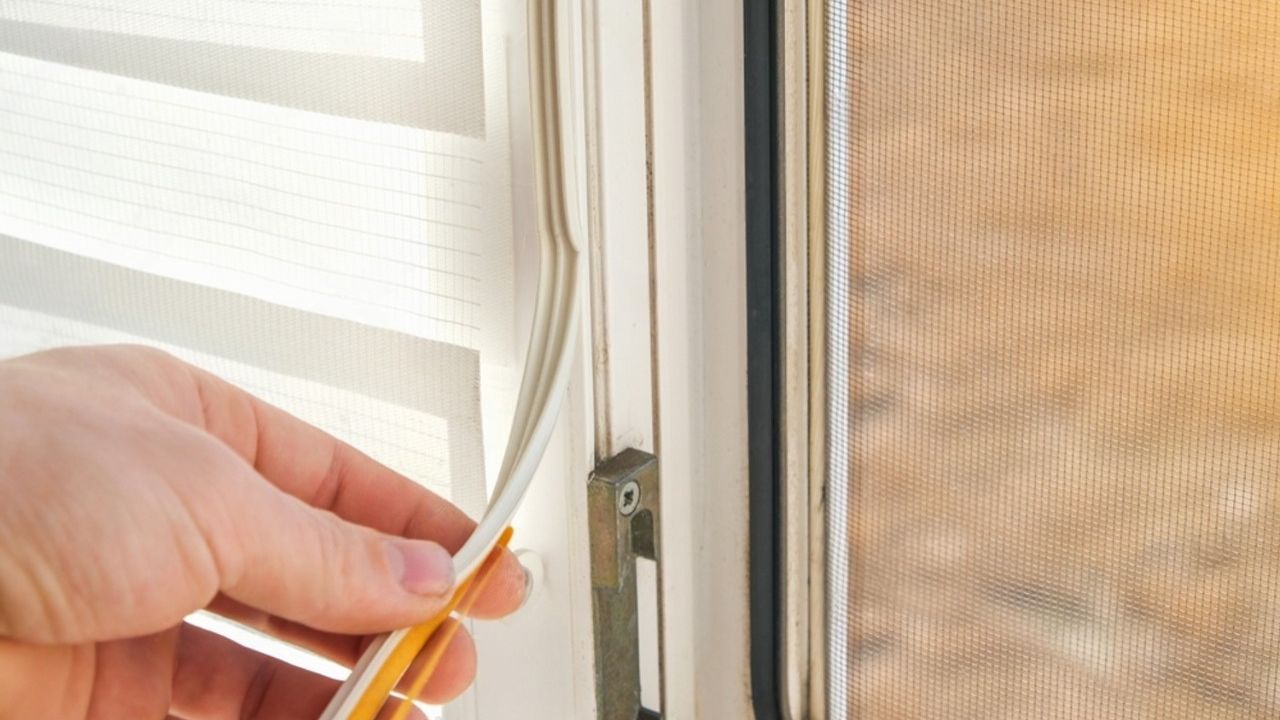
Photo credit: Olya Detry/Shutterstock
Cold air slipping in around doors and windows does more than chill your feet, it quietly drives up your heating bill and strains your furnace just when you need it most. The good news is that you can track down most of those leaks with simple, low‑tech checks long before the deep freeze arrives. With a few minutes of focused inspection and some basic household tools, you can spot problem areas early and decide which ones need a quick DIY fix and which might justify a call to a pro.
The key is to move methodically, using your senses and a handful of proven tests to reveal where outside air is sneaking indoors. By combining touch, sight, and a couple of clever tricks like smoke or light, you can build a clear map of your home’s weak spots and tighten them up before the cold really locks in.
Why drafts matter long before the first frost
Drafts are not just a comfort issue, they are a sign that the building envelope is leaking, which means your heating system has to work harder to keep rooms at a steady temperature. When cold air seeps in around a sash or door frame, warm air you already paid to heat escapes, and the result is higher energy use and more wear on your equipment. Federal guidance on Detecting Air Leaks stresses that You can often feel these leaks as cool spots on a windy day, especially around windows, doors, and electrical openings.
Those small gaps also create uneven temperatures, with cold corners and chilly seating areas that never quite feel comfortable. Over time, persistent leaks near frames can invite moisture, which raises the risk of condensation, frost, and even rot in wood components. When you identify and seal these openings early, you not only cut wasted energy but also protect finishes, trim, and insulation from slow, hidden damage that is far more expensive to repair later.
Start with a slow lap: visual checks that catch the obvious leaks
The simplest way to begin is with a deliberate walk around your home, inside and out, looking closely at every window and exterior door. One contractor guide recommends a Nov routine that starts with a Visual inspection, advising you to Take your time and Carefully examine the caulking between the siding and frames, as well as any trim that looks separated or cracked. On the inside, look for daylight peeking around door jambs, loose weatherstripping, or gaps where the casing meets the wall.
Another guide on Visual Inspection notes that While you cannot see the air itself, you can see the clues it leaves behind, such as hairline cracks in caulk, gaps between the window frame and drywall, or deteriorated sealant along the sill. Outside, check for peeling paint, warped trim, or darkened wood that might signal water intrusion around a leaky joint. This slow lap sets your baseline, flagging the spots that deserve closer testing with your hand, smoke, or light.
Use your senses: feeling for cold air and temperature changes
Once you have a list of suspect areas, your next move is to let your skin do the work. On a breezy day, stand close to each window and door and pay attention to how the air feels on your face and hands. A guide on Common Signs of Drafty Windows points out that simply Feeling a Breeze or a subtle Temperature Change Near Windows is often the first clue that you have an air leak, even before you see any visible damage. If one side of a room feels noticeably cooler than the rest, that is a strong hint that outside air is slipping in nearby.
Manufacturers that focus on seasonal upkeep advise you to Run your hand slowly around the edges of each sash and door slab, especially along the bottom where weatherstripping often wears out first. They also urge you to Pay attention to corners and meeting rails, where small misalignments can create narrow channels for air and even spots where water might have infiltrated. A social video that urges you to Spot hidden drafts before winter chills set in echoes that advice, telling you to Feel for cold air with your hand and to look for gaps, cracks, or worn weatherstripping as soon as you sense a temperature shift.
Turn your home into a simple test lab: pressurization, smoke, and hand checks
After you have used basic touch, you can get more precise by slightly changing the air pressure inside your home. Federal energy experts describe a Building Pressurization Test that involves closing all windows and exterior doors, shutting off combustion appliances, and using exhaust fans to create negative pressure so outside air is drawn in through leaks that then feel cool to your hand. This simple setup makes it easier for You to run your fingers along suspect joints and immediately notice where air is being pulled inside.
Insurance guidance suggests that You can also try a smoke test to visualize those leaks. One step‑by‑step explainer recommends that on a windy day you close windows and doors, turn off appliances, Then hold a lit stick of incense or a candle near frames and watch how the smoke behaves, a method echoed in advice on how to find and stop air leaks. Another list of Mar Ways to Test for Air Leaks highlights the Good Ole Hand Test, reminding You that you can simply use your hand along baseboards, outlets, and exterior walls of your home to feel for moving air without any special tools.
Light and water tricks: flashlight, condensation, and hidden clues
Light can be just as revealing as smoke when you suspect a gap around a door or window. A guide that answers “How Do I Check For Drafts?” recommends a Flashlight Test, where one person shines a bright beam along the edges of a closed door or window from outside while another watches from inside. If you can see the light streaming through, that is a clear sign of a path where air is also moving. This same resource, titled Sep How Do I Check For Drafts, stresses that even a thin sliver of visible light can translate into a surprising amount of heat loss over a full winter.
Moisture patterns offer another simple diagnostic. A social explainer that urges you to Spot hidden drafts notes that you should Notice spots where condensation or frost forms more easily on certain panes, which often signals a cold edge or failed seal. A separate plumbing guide on how to detect and prevent hidden leaks points out that this kind of inspection is a straightforward DIY task that requires minimal tools and expertise, and the same principle applies when you are scanning window sills and frames for water stains or bubbling paint that hint at air and moisture intrusion working together.
Know the classic symptoms: rattles, cold spots, and drafty window behavior
Even without any tests, certain patterns in how your home feels and sounds can tip you off to trouble. One contractor lists Nov Signs Of a Drafty Window, explaining that As the winter winds pick up, you might notice curtains moving slightly, a whistling sound, or a persistent chill near a particular pane. If you find yourself avoiding a favorite chair because it always feels cooler, or if you see higher heating bills without changing your thermostat, those are classic signs that a sash or frame is leaking.
Energy specialists who outline Common Signs of Drafts in Your Home emphasize Cold spots near windows and doors, where you feel chilly areas or notice temperature differences when you walk from one side of a room to the other. Another breakdown of Nov How to Fix Drafty Windows notes that What Causes Drafty Windows can range from worn weatherstripping to warped frames, and that one giveaway is when windows rattle in the wind or feel loose when you push on them. These behavioral clues help you prioritize which openings deserve immediate attention before temperatures drop further.
Zero in on windows: frames, glass, and simple window‑specific tests
Windows are often the biggest source of heat loss, so it pays to give them extra scrutiny. A detailed Step by Step Guide to Check Your Windows for Drafts advises you to Inspect the Window Frames and Glass Examine the joints where the frame meets the wall, the condition of the glazing around each pane, and any cracks or chips in the glass itself. If you see gaps in the caulk, dried or crumbling glazing putty, or sashes that no longer sit square in the frame, those are strong indicators of air pathways that need sealing or adjustment.
Another breakdown on How to Identify Window Drafts highlights The Flame and Smoke Test, instructing you to Light a candle or incense and move it slowly around the edges of your window. If the flame flickers or the Smoke Test shows the trail bending sharply, you have found a leak that should be repaired or replaced promptly. A homeowner‑focused video titled Cold draughts? demonstrates similar window checks, showing how small adjustments to latches and hinges, along with temporary films or seals, can dramatically cut the chill without a full replacement.
Do not forget the doors: thresholds, weatherstripping, and moving parts
Exterior doors are often opened and closed dozens of times a day, which means their seals wear out faster than window components. A fall maintenance checklist that urges you to Sep Check for leaks and drafts recommends that you Run your hand around the edges of each door, paying particular attention to the bottom sweep and latch side where gaps often appear. It also reminds you to Pay attention to areas where water might have infiltrated, since staining or swelling at the threshold can signal both moisture and air slipping past a failed seal.
Home warranty experts who explain How to locate a draft in your home advise that Before you can fix those drafty windows and doors, you need to pinpoint where the air leaks are by looking for light around the frame, feeling for moving air, and checking for worn or missing weatherstripping. They note that a door that no longer latches cleanly or that scrapes at one corner can be a sign of shifting that has opened up new gaps needing attention. Once you have identified those spots, replacing a threshold, adding a new sweep, or installing adhesive foam strips is often enough to cut the draft significantly.
Free and low‑cost hacks to seal leaks once you find them
After you have mapped out the leaks, you can often make a noticeable difference with inexpensive materials and a bit of time. A homeowner blog that lists Mar 8 Free Ways to detect drafty windows and doors suggests using temporary plastic film, rope caulk, and even rolled towels at the base of doors as quick barriers while you plan more permanent fixes. It also reminds you that even small cracks in trim or caulk lines are pathways where cold air can sneak inside, so a tube of exterior‑grade sealant can be one of the highest value purchases you make before winter.
A window specialist that explains How to Find a Window Draft recommends that When you are trying to identify a draft, you Wet your fingers and move them slowly around the frame to feel exactly where the draft is coming from, then apply targeted weatherstripping or sealant at that point. The same resource on how to Find a Window Draft notes that simple foam tape, V‑strip, and door sweeps are often enough to tame moderate leaks. A video on winter‑proofing titled Winter‑Proof Your Home shows that even cheap or free hacks like adjusting strike plates, tightening hinges, and adding draft stoppers can noticeably cut Cold air without major renovation.
When to call in help and how to stay ahead of next winter
Not every draft calls for a contractor, but some patterns are a sign that professional assessment is worth the cost. The detailed winter prep Step Guide to Check Your Windows for Drafts explains that if you see extensive rot, fogged double‑pane glass, or frames that are badly out of square, it may be time to consider repair or replacement rather than another round of caulk. Similarly, the breakdown of Fix Drafty Windows notes that What Causes Drafty Windows can include structural issues like shifting foundations or failing seals that a specialist is better equipped to diagnose and correct.
At the same time, many checks and minor fixes are well within reach for a careful homeowner. The comfort guide that outlines How To Detect Drafts: DIY emphasizes that with patience you can methodically move from room to room, pinpointing exactly where drafts are and sealing them as you go. If you build a habit of repeating these checks each fall, combining Visual Inspection, hand tests, smoke, and light, you will head into each heating season with fewer surprises, a more comfortable home, and a better handle on your energy costs.